Orange Refrigerator Cake: A No-Bake Citrus Dessert Dream Come True
When life hands you oranges, skip the juice and make this instead—Orange Refrigerator Cake. This bright, creamy, and indulgent no-bake dessert layers zesty orange custard, fluffy whipped cream, and tender ladyfinger cookies into a chilled cake that’s light enough to devour on a summer afternoon but rich enough to serve at a holiday table.
The best part? You don’t need to turn on the oven. That’s right. This is the kind of dessert you can prep in under 30 minutes, toss in the fridge, and forget about until it’s magically transformed into a sliceable citrus dream. It’s perfect when you’re short on time, entertaining guests, or just looking for something different from the usual cakes and cookies.
Why You’ll Love Orange Refrigerator Cake
There’s so much to love about this humble but heavenly dessert. Let’s break it down:
- No-bake and fuss-free: No oven. No eggs to temper. No need to stress.
- Citrusy and fresh: Fresh orange juice and zest make it pop with flavor.
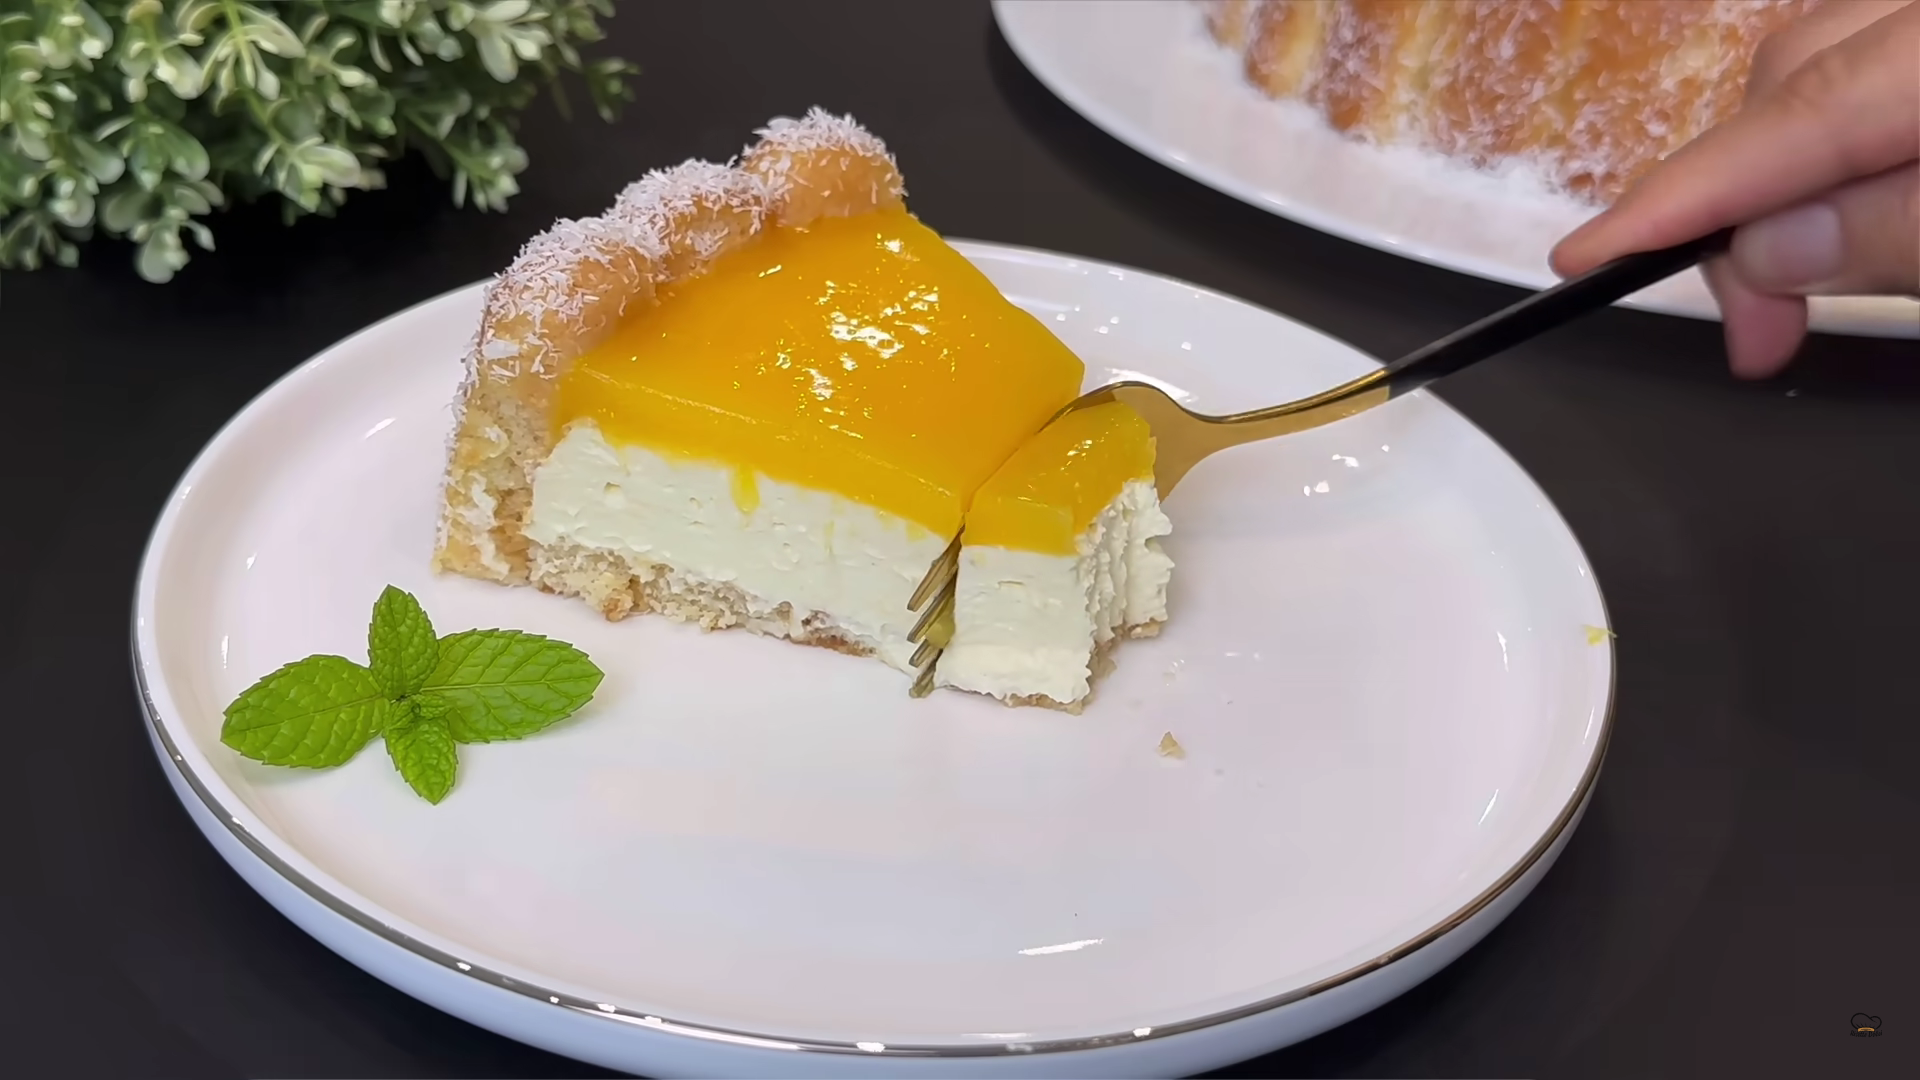
- Soft and creamy texture: Layers of airy whipped cream, velvety custard, and softened cookies.
- Make-ahead magic: It gets better as it chills—perfect for prepping ahead.
- Versatile and customizable: Use different cookies, add fruit layers, or adjust the sweetness.
Whether you’re making this for a potluck, birthday, brunch, or just a quiet weekend treat, this Orange Refrigerator Cake will wow you with its ease and bright, feel-good flavor.
Ingredients You’ll Need
The beauty of this dessert is its simplicity. You’ll need a handful of pantry staples and a few fresh oranges to make it happen.
For the Orange Custard:
- 2 cups (480 ml) fresh orange juice (from about 5-6 oranges)
- Zest of 1 orange
- 1/2 cup (100 g) granulated sugar (adjust to taste)
- 3 tablespoons cornstarch
- Pinch of salt
For the Cream Layer:
- 1 1/2 cups (360 ml) cold heavy whipping cream
- 1/4 cup (30 g) powdered sugar
- 1 teaspoon pure vanilla extract
- 8 oz (225 g) cream cheese or mascarpone, softened
For Assembly:
- 20–25 ladyfinger cookies (savoiardi) or graham crackers
- 1/2 cup (120 ml) milk or orange juice (for dipping)
- Desiccated coconut or crushed cookies for coating (optional)
- Fresh orange slices or zest for garnish
Tools You’ll Need
- Medium saucepan
- Mixing bowls
- Electric hand mixer or stand mixer
- Silicone spatula
- Whisk
- 8×8 or 9×9-inch dish (or similar mold)
- Plastic wrap or foil
Step-by-Step Instructions
Let’s walk through the process together. You’ll find this recipe to be beginner-friendly, with minimal hands-on work and maximum flavor payoff.
Step 1: Make the Orange Custard
In a saucepan, combine the fresh orange juice, orange zest, granulated sugar, cornstarch, and a pinch of salt. Whisk until smooth and no lumps remain.
Set the saucepan over medium heat. Stir continuously until the mixture starts to thicken—about 5 to 8 minutes. Once it reaches a pudding-like consistency, remove it from the heat.
Pour the custard into a bowl and let it cool slightly. Press plastic wrap directly onto the surface to prevent a skin from forming. Set aside to cool completely, or pop it in the fridge to speed things up.
Tip: Taste the custard before removing from the heat. If you like it sweeter, add a bit more sugar. If you prefer a tangier bite, stir in a splash of lemon juice!
Step 2: Whip the Cream
In a chilled mixing bowl, whip the cold heavy cream, powdered sugar, and vanilla extract on medium-high speed until soft peaks form. This usually takes about 3–5 minutes.
In a separate bowl, beat the softened cream cheese or mascarpone until smooth. Gently fold it into the whipped cream until fully combined and smooth.
Set the mixture aside in the refrigerator.
Step 3: Prep the Cookies
Quickly dip the ladyfingers or graham crackers in milk (or orange juice for extra citrus flavor). You don’t want them soggy—just lightly moistened so they soften while chilling.
Note: If using graham crackers, there’s no need to dip them. They’ll naturally absorb moisture from the cream.
Step 4: Assemble the Cake
Line the bottom of your dish with a single layer of dipped cookies.
Spread about one-third of the whipped cream mixture over the cookies, smoothing it out with a spatula.
Spoon and spread half of the cooled orange custard over the cream layer. Repeat: another layer of cookies, cream, and the rest of the custard.
Finish with a final layer of whipped cream. Smooth the top and cover the dish tightly with plastic wrap or foil.
Step 5: Chill and Set
Refrigerate your cake for at least 4 hours, or overnight for best results. This allows the layers to meld, the cookies to soften, and the flavors to develop into something truly luscious.
Pro Tip: Don’t skip the chill time! It’s what transforms the individual components into a cohesive, sliceable dessert.
Step 6: Garnish and Serve
Once fully chilled and set, garnish the cake with desiccated coconut, crushed cookies, or orange zest. Add thin slices of fresh orange or even candied peel for flair.
Slice and serve chilled. Watch your guests’ eyes light up with that first creamy, citrusy bite.
Serving Suggestions
- Serve as-is or with a side of fresh berries for a color contrast.
- For a fancy dinner party, pipe whipped cream rosettes on top and garnish with edible flowers.
- Make individual servings in jars or cups for an elegant presentation at showers or buffets.
Customization Ideas
Here’s where you can make this cake your own:
🍓 Fruit Variations
- Layer in thin slices of strawberries, kiwi, or blueberries between the cream and custard for extra freshness.
🍋 Citrus Swap
- Swap some of the orange juice with lemon or lime for a sharper, tangier profile.
🍫 Chocolate Orange Twist
- Add a layer of shaved dark chocolate or chocolate ganache between the custard and cream.
🧁 Mini Trifles
- Layer the components into glasses for a layered trifle look—perfect for portion control and presentation.
🍪 Different Base Options
- Try digestive biscuits, vanilla wafers, or even a sponge cake base instead of ladyfingers.
Expert Tips for Success
1. Zest First, Juice Later
Always zest your citrus before juicing. Once the fruit is cut, it’s harder to zest.
2. Chill the Bowl for Cream
Cold equipment makes whipping cream easier and faster.
3. Don’t Over-Whip the Cream
Stop once you reach soft peaks to avoid curdling or a grainy texture.
4. Cool the Custard Completely
Adding warm custard to the cream can cause it to separate. Patience pays off!
5. Let It Set Overnight
For the cleanest slices and the most cohesive texture, give the cake ample time in the fridge.
Storing Your Orange Refrigerator Cake
Refrigerator: Store tightly covered in the fridge for up to 4–5 days.
Freezer: You can freeze it, but the texture may change slightly. Wrap well and thaw in the fridge overnight before serving.
Frequently Asked Questions
Can I use store-bought orange juice?
Fresh juice is best for bright flavor, but store-bought works in a pinch. Just make sure it’s pulp-free and unsweetened.
Is this cake gluten-free?
Only if you use gluten-free cookies. The filling itself is naturally gluten-free.
Can I make this dairy-free?
Yes—use coconut cream instead of whipping cream, and a dairy-free cream cheese alternative. Choose plant-based cookies too.
What size pan should I use?
An 8×8 or 9×9-inch dish works best, but you can also use a loaf pan or make individual servings in jars.
Final Thoughts: A Dessert That Feels Like Sunshine
The Orange Refrigerator Cake is more than a dessert—it’s a mood. It’s that bright, cool sigh of relief at the end of a hot day, the perfect treat to bring to a gathering, or a little slice of citrus sunshine when you need it most.
The silky layers of whipped cream and orange custard melt into each other like a dream. It’s a recipe that feels nostalgic yet modern, simple yet showstopping. And once you make it, you’ll understand why it becomes a family favorite.
You don’t need fancy ingredients or a baking degree to whip this up—just some fresh oranges, a few simple steps, and a bit of fridge time. So go ahead. Make this cake once, and you’ll find yourself coming back to it every season.
Call to Action
🍊 Ready to bring this citrus dream to life?
Print or pin this recipe and make it for your next brunch, birthday, or lazy Sunday afternoon. Trust me—your taste buds will thank you.