No-Bake Tiramisu Cake: An Elegant, Creamy Classic Without the Oven
When it comes to desserts that feel both luxurious and comforting, tiramisu always takes the crown. The combination of creamy mascarpone, espresso-soaked ladyfingers, and a dusting of cocoa creates a perfect balance of flavors and textures. It’s rich without being heavy, decadent without being overly sweet, and best of all, it feels like a dessert that belongs in a fancy European café. But what if I told you that you could enjoy all the indulgence of traditional tiramisu in the form of a no-bake cake?
That’s right — no baking, no complicated techniques, no water baths or hot ovens. Just layers of pure delight that come together easily and chill in the fridge until you’re ready to serve. This No-Bake Tiramisu Cake recipe is perfect for warm days when you don’t want to heat up the kitchen, or for those times when you want to impress your guests with something that looks and tastes restaurant-worthy, without the stress.
In this post, I’ll guide you through every step of creating your own no-bake tiramisu cake. We’ll cover everything from picking the right ingredients to layering tips, plus plenty of ways to personalize the dessert for your own taste. Whether you’re a tiramisu veteran or it’s your first time trying this Italian classic, this version will quickly become one of your favorite make-ahead desserts.
What Is Tiramisu?
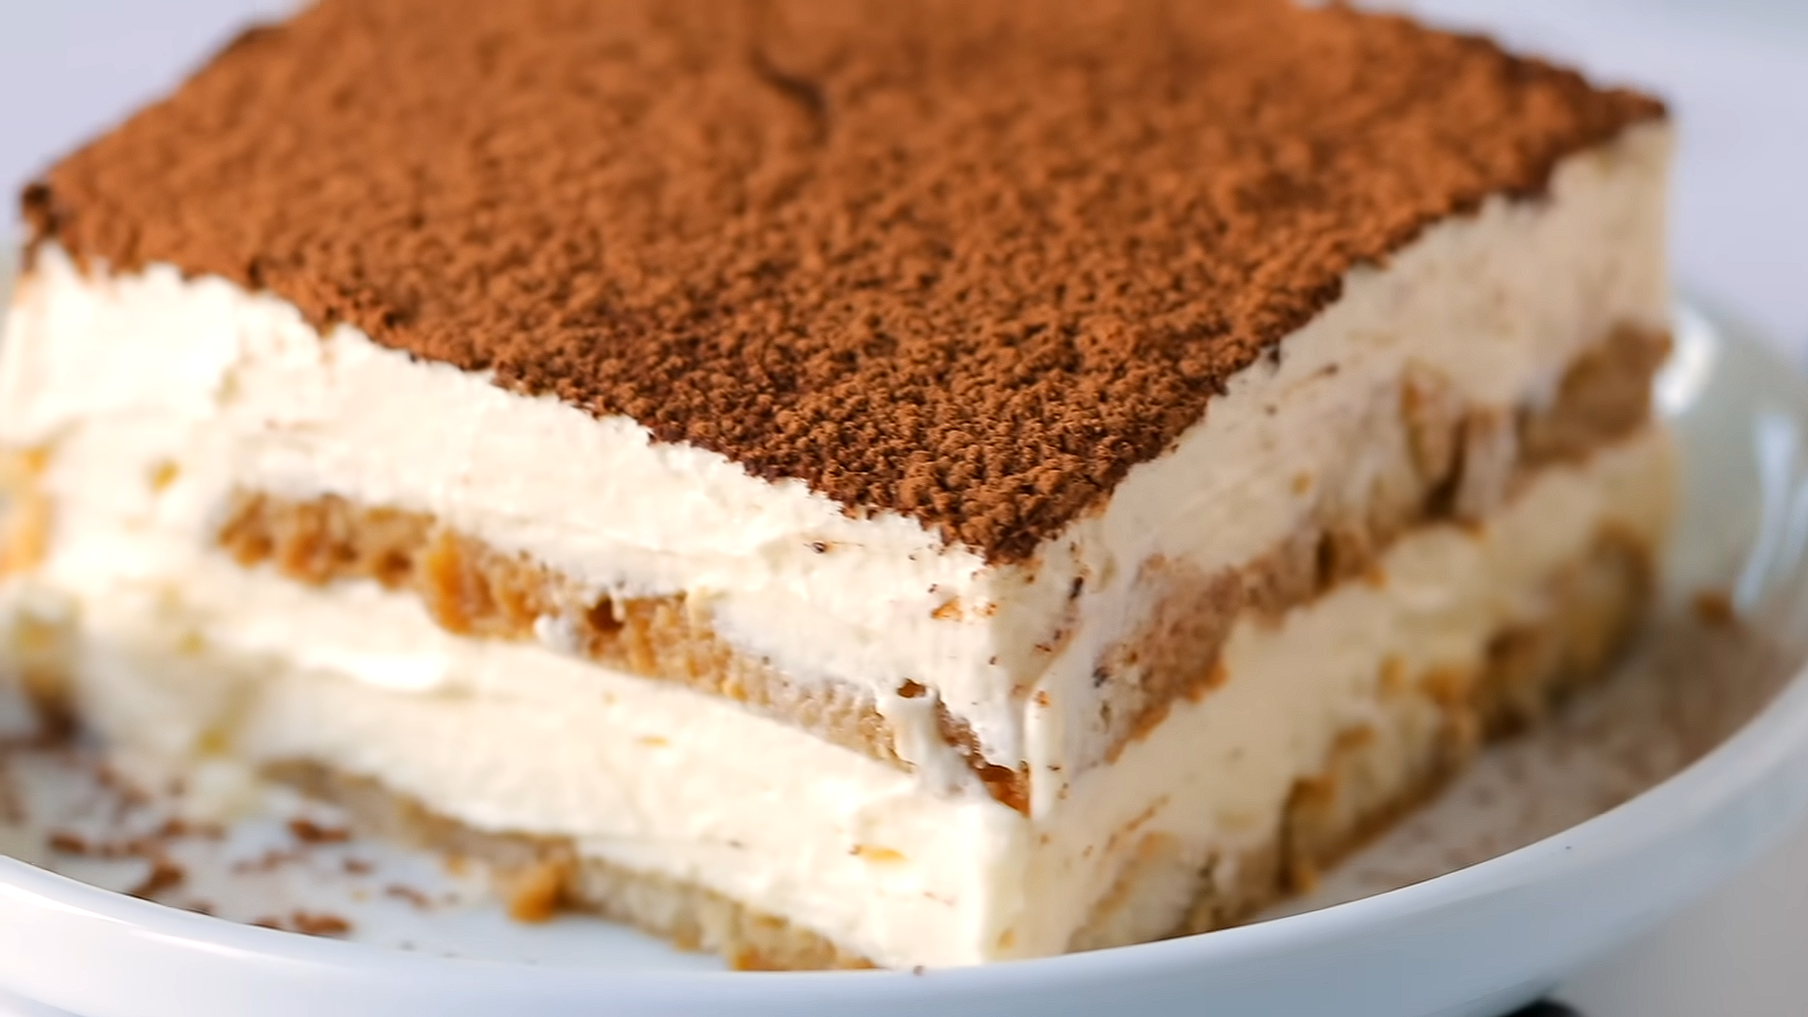
Tiramisu, which means “pick me up” in Italian, is a layered dessert that typically includes espresso-soaked ladyfingers, a rich mascarpone cheese filling, whipped cream or egg-based custard, and cocoa powder. It’s known for its silky texture and slightly boozy flavor, thanks to a splash of coffee liqueur or Marsala wine.
While the original tiramisu is served in a dish or trifle-style glass, this no-bake version takes the concept and transforms it into a layered cake that holds its shape beautifully when sliced. It’s like a hybrid between a mousse cake and a classic tiramisu, and the result is unforgettable.
Why You’ll Love This No-Bake Tiramisu Cake
- No oven required, making it perfect for summer or busy baking days.
- Elegant presentation, ideal for dinner parties and holidays.
- Make-ahead friendly, which means less last-minute stress.
- Customizable with alcohol or alcohol-free options.
- Fluffy, creamy, and light, with just the right amount of richness.
Ingredients You’ll Need
This recipe serves 10 to 12 generous slices.
For the Cream Filling
- 1 ½ cups heavy whipping cream, cold
- 16 ounces mascarpone cheese, room temperature
- ¾ cup powdered sugar
- 1 teaspoon pure vanilla extract
For the Espresso Mixture
- 1 ½ cups brewed espresso or very strong coffee, cooled
- ¼ cup coffee liqueur (like Kahlúa) or Marsala wine (optional)
- 1 tablespoon granulated sugar
For Assembly
- 2 packages of ladyfinger biscuits (about 40 to 45 pieces total)
- Unsweetened cocoa powder for dusting
- Shaved dark chocolate or chocolate curls (optional)
Equipment
- 9-inch springform pan (or a square baking dish if you don’t need a circular shape)
- Electric mixer or stand mixer
- Fine mesh sieve for dusting
- Offset spatula or regular spatula for spreading
Step-by-Step Instructions
This cake takes about 30 minutes to prepare, but it needs at least 6 hours (preferably overnight) to chill and set properly.
Step 1: Brew the Coffee
Start by brewing your espresso or strong coffee. You want it to be dark and bold, but not bitter. Let it cool to room temperature before using. Once cool, stir in the coffee liqueur or Marsala wine and the granulated sugar. Set aside.
Tip: Brew your coffee earlier in the day so it has plenty of time to cool. You don’t want warm liquid softening the ladyfingers too much.
Step 2: Whip the Cream
In a large mixing bowl, use a hand mixer or stand mixer with a whisk attachment to whip the cold heavy cream. Beat on medium-high speed until stiff peaks form, which should take about 3 to 4 minutes. Be careful not to overwhip, or you’ll end up with butter.
Set the whipped cream aside.
Step 3: Mix the Mascarpone Layer
In another bowl, beat the mascarpone cheese, powdered sugar, and vanilla extract until smooth and creamy. This should take 1 to 2 minutes. Make sure the mascarpone is at room temperature so it blends easily.
Once smooth, gently fold the whipped cream into the mascarpone mixture. Use a spatula and fold in small batches until fully incorporated. You’ll end up with a light, fluffy cream that’s easy to spread.
Step 4: Prepare the Pan
If you’re using a springform pan, line the bottom with parchment paper to make it easier to remove the cake later. You can also line the sides with acetate or parchment for cleaner edges.
Step 5: Layer the Cake
Now it’s time to build your no-bake tiramisu cake.
First Layer:
- Quickly dip each ladyfinger into the coffee mixture. Dip for just 1 second per side — you want them moist but not falling apart.
- Arrange a single layer of dipped ladyfingers in the bottom of the pan, trimming as needed to fill gaps.
- Spread one-third of the mascarpone mixture evenly over the ladyfingers.
Second Layer:
- Repeat the dipping process with more ladyfingers, arranging them on top of the first cream layer.
- Spread another third of the mascarpone mixture.
Final Layer:
- Add the final layer of dipped ladyfingers.
- Spread the remaining mascarpone cream over the top, smoothing it with an offset spatula.
Step 6: Chill the Cake
Cover the cake with plastic wrap and refrigerate for at least 6 hours. Overnight is best. This chilling time allows the layers to meld together and gives the cake its signature texture.
Step 7: Finish and Decorate
Just before serving, remove the sides of the springform pan. Use a fine mesh sieve to dust the top of the cake generously with unsweetened cocoa powder. Add chocolate shavings, curls, or even a sprinkle of espresso powder if you want a little extra intensity.
Slice and serve chilled.
Tips for Success
Use Quality Ingredients
Tiramisu is all about simple ingredients done right. Use high-quality mascarpone, real vanilla extract, and espresso or strong coffee made from good beans. These choices make a huge difference in flavor.
Don’t Over-Soak the Ladyfingers
It’s tempting to let them sit in the coffee mixture, but they absorb liquid very quickly. A quick dip is enough. Oversoaked ladyfingers will turn mushy and make the cake soggy.
Make It Ahead
This cake is even better the next day. Letting it chill overnight allows the flavors to deepen and the texture to set properly. It’s the perfect dessert to prepare ahead for a dinner party or holiday gathering.
Alcohol-Free Option
If you’re serving this to kids or avoiding alcohol, skip the liqueur and add 1 teaspoon of pure almond extract or vanilla to the coffee mixture for extra depth of flavor.
For a Neater Slice
Use a sharp knife dipped in hot water and wiped dry between each cut. This helps create clean slices that show off the layers beautifully.
Variations and Creative Twists
While classic tiramisu is hard to beat, there are so many fun ways to customize this recipe:
- Chocolate Tiramisu: Add melted chocolate or cocoa powder to the mascarpone layer for a richer twist.
- Fruit Tiramisu: Add a layer of sliced strawberries or raspberries between the cream layers.
- Nutty Tiramisu: Sprinkle chopped hazelnuts or almonds between layers for texture.
- Mocha Tiramisu: Stir a tablespoon of cocoa powder into the coffee soak and add a dash of espresso powder to the cream.
- Holiday Tiramisu: Add cinnamon and nutmeg to the cream and soak the ladyfingers in spiced chai tea or pumpkin spice coffee.
Storage and Leftovers
- In the fridge: Store the tiramisu cake covered in the refrigerator for up to 4 days.
- In the freezer: You can freeze the assembled cake (without cocoa on top) for up to 1 month. Wrap tightly in plastic wrap and foil. Thaw in the fridge overnight before serving.
- Avoid the microwave: Since this is a chilled dessert, reheating is not necessary or recommended.
Final Thoughts
This No-Bake Tiramisu Cake is a show-stopping dessert that’s as easy to make as it is beautiful. With layers of espresso-soaked ladyfingers and creamy mascarpone, it’s light yet rich, simple yet elegant. You don’t need to be a pastry chef to pull off this cake — just a little patience, some good ingredients, and a love of coffee and cream.
Whether you’re making it for a birthday, a special occasion, or just because you want something amazing to enjoy with your evening coffee, this cake delivers on all fronts. It’s the kind of dessert that gets people talking, asking for the recipe, and going back for seconds.
Once you’ve made it once, it’ll become one of those go-to recipes that lives in your memory and in your kitchen for years to come.