Mini Lemon Cheesecakes: A Bite-Sized Treat Bursting with Zesty Sunshine
There’s something undeniably magical about lemon desserts. The bright, tangy flavor of lemon has a way of lifting your mood and awakening your senses. Pair it with the creamy richness of cheesecake, and you’ve got a combination that’s downright irresistible. Now shrink that down into adorable little single-serve portions, and you have Mini Lemon Cheesecakes the kind of treat that disappears almost as fast as you can make them.
These mini cheesecakes are perfect for spring and summer gatherings, baby showers, birthdays, holidays, or just a weekend baking session when you’re craving something sweet but not too heavy. The beauty of this recipe is not just in its flavor, but in its simplicity. You don’t need a water bath or fancy equipment. A muffin tin and some cupcake liners will do just fine.
Whether you’re a seasoned baker or new to the kitchen, this recipe is beginner-friendly and foolproof with just the right amount of lemon to balance the sweetness. The texture? Creamy, silky, and smooth with a delicate zing that dances on your tongue. Topped with a swirl of whipped cream or a dollop of lemon curd, each bite-sized cheesecake is pure sunshine in dessert form.
Ingredients
Let’s break the recipe into two main parts: the crust and the cheesecake filling, followed by optional toppings.
For the Crust:
- 1 cup graham cracker crumbs (about 8 full sheets)
- 2 tablespoons granulated sugar
- 4 tablespoons unsalted butter, melted
For the Cheesecake Filling:
- 16 oz (2 blocks) cream cheese, softened to room temperature
- 1/2 cup granulated sugar
- 2 large eggs
- 1/4 cup sour cream
- 2 tablespoons all-purpose flour
- 2 tablespoons fresh lemon juice (about 1 medium lemon)
- 1 tablespoon lemon zest
- 1 teaspoon vanilla extract
Optional Toppings:
- Whipped cream
- Lemon zest curls
- Lemon curd
- Fresh berries (blueberries or raspberries go beautifully)
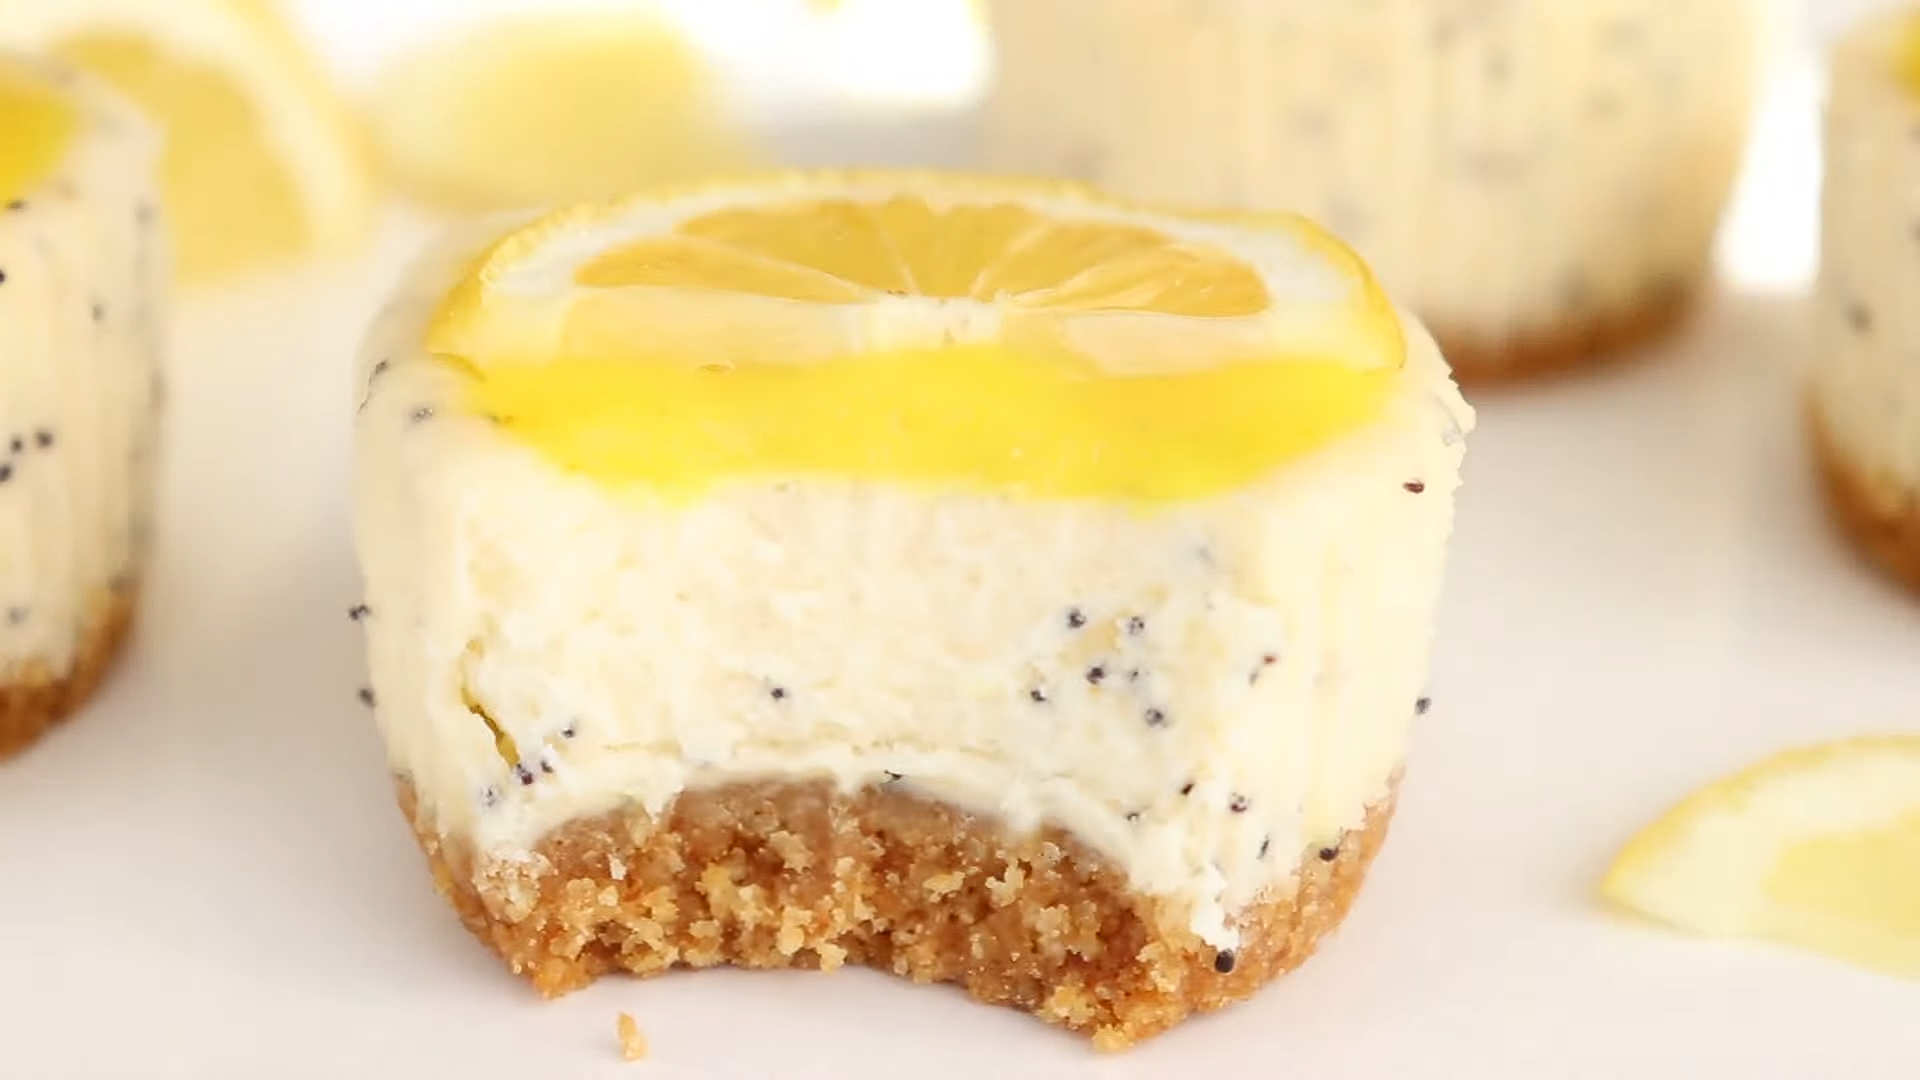
- Thin lemon slices
Kitchen Tools You’ll Need
- Standard 12-cup muffin tin
- Cupcake liners (paper or foil)
- Mixing bowls
- Hand mixer or stand mixer
- Microplane or fine grater (for zest)
- Citrus juicer (optional, but helpful)
- Spoon or small measuring cup (to press crust)
- Cooling rack
- Refrigerator space for chilling
Step-by-Step Instructions
Step 1: Prep Your Pan and Oven
Start by preheating your oven to 325°F (163°C). Line a 12-cup muffin tin with cupcake liners. Paper liners work great, but foil ones are sturdier and often give you cleaner edges when peeling off.
Set the pan aside while you move on to the crust.
Step 2: Make the Graham Cracker Crust
In a small bowl, combine the graham cracker crumbs, granulated sugar, and melted butter. Stir until the mixture resembles wet sand and holds together when pressed.
Scoop about 1 tablespoon of the crust mixture into each cupcake liner. Use the back of a spoon or a small glass to press it down firmly and evenly.
Tip: If you want a thicker crust, use a heaping tablespoon.
Bake the crusts for 5 minutes, just enough to set them. Remove from the oven and let cool slightly while you prepare the cheesecake batter.
Step 3: Make the Cheesecake Filling
In a large bowl, beat the softened cream cheese until smooth and creamy — about 2–3 minutes. Scrape down the sides of the bowl as needed to ensure no lumps remain.
Add in the granulated sugar and beat again until combined and fluffy.
Now beat in the eggs, one at a time, mixing just until each is incorporated. Overbeating can lead to cracks later, so go gently.
Add the sour cream, flour, lemon juice, lemon zest, and vanilla extract. Mix until everything is smooth and well blended. Don’t worry if the batter seems slightly runny — that’s normal.
Step 4: Fill the Muffin Cups
Divide the cheesecake batter evenly between the muffin cups. Fill each about three-quarters full. The batter should sit just below the edge of the cupcake liner.
Give the pan a gentle tap on the counter to remove any air bubbles.
Step 5: Bake
Place the pan in the oven and bake at 325°F (163°C) for 16–20 minutes, or until the centers are just set. A slight jiggle in the middle is okay — they’ll firm up as they cool.
Avoid opening the oven door too often during baking, which can cause them to sink or crack.
Step 6: Cool Completely
Once baked, remove the cheesecakes from the oven and let them cool in the pan on a wire rack for about 30 minutes.
After that, transfer them (still in the liners) to the refrigerator and chill for at least 2 hours, or ideally overnight. This chilling time allows the flavor to develop and the texture to set.
Step 7: Add Your Favorite Toppings
Right before serving, top each mini cheesecake with your choice of finishing touches.
Here are some ideas:
- A spoonful of lemon curd adds an extra lemon punch.
- A swirl of whipped cream gives them a light, fluffy finish.
- A single fresh berry adds color and contrast.
- A twist of lemon zest or a thin lemon slice for that citrusy pop.
You can go as simple or fancy as you like. These are your cheesecakes, after all.
Tips for Success
Here are some tips and tricks to make sure your mini lemon cheesecakes turn out perfect every time:
1. Use Room Temperature Ingredients
Cold cream cheese won’t mix smoothly and can lead to a lumpy batter. Let your cream cheese, eggs, and sour cream sit at room temp for at least 30 minutes before using.
2. Don’t Overmix the Batter
Overmixing can incorporate too much air, causing the cheesecakes to puff up and then deflate or crack as they cool. Mix just until the ingredients are combined.
3. Use Fresh Lemon Juice and Zest
Bottled lemon juice doesn’t have the same bright flavor. Freshly squeezed juice and zest give the best results.
4. Let Them Cool Gradually
Rapid changes in temperature can lead to cracking. Allowing them to cool slowly at room temp before refrigerating helps avoid this.
5. Make Ahead for Easy Entertaining
These cheesecakes are a great make-ahead dessert. They keep well in the fridge for up to 5 days and can even be frozen for up to a month.
To freeze: Wrap each cheesecake (without toppings) in plastic wrap, then place them in an airtight container or zip-top bag. Thaw in the fridge overnight before serving.
Variations to Try
Want to mix things up a little? This mini cheesecake base is super versatile. Here are some fun variations:
Lemon Raspberry Mini Cheesecakes
Before baking, drop a fresh raspberry or two into the center of each cheesecake. The sweet-tart burst of berry pairs beautifully with lemon.
Lemon Blueberry Swirl
Swirl a teaspoon of blueberry jam into the top of the batter for a beautiful marbled effect.
Gluten-Free Option
Use gluten-free graham crackers or crushed gluten-free cookies for the crust.
Low-Sugar Version
Try using a natural sweetener like monk fruit or stevia blend in place of granulated sugar, and go light on the toppings.
Why We Love These Mini Lemon Cheesecakes
There’s a lot to love about this recipe, but here’s a short list of what makes it truly special:
- Portion control: Each one is perfectly sized for a sweet treat without overindulging.
- Easy to serve: No slicing or messy plating required.
- Travel-friendly: Take them to potlucks, picnics, or parties — they’re easy to transport and crowd-pleasing.
- Customizable: Switch up the toppings, crust, or flavor twist depending on your mood or the season.
Final Thoughts
Mini Lemon Cheesecakes are a dessert that manages to be indulgent and refreshing at the same time. They’re creamy and rich, but the lemon gives them a brightness that keeps them from feeling too heavy. Plus, their small size makes them feel more special — and let’s be honest, cuter.
Whether you’re baking for a celebration or simply treating yourself to something homemade, these mini cheesecakes deliver a delightful balance of sweet, tangy, and creamy in every bite. And since they can be made ahead of time, they’re the perfect make-ahead treat that tastes even better the next day.
So go ahead, whip up a batch, and let the zesty flavor of lemon brighten your day one mini cheesecake at a time.