Chicken Bacon Ranch Sliders: The Ultimate Crowd-Pleasing Comfort Food
There’s a special kind of joy that comes with pulling a tray of warm sliders out of the oven. The cheese is melty, the rolls are golden, and the smell alone could make you weak in the knees. But when you add shredded chicken, crispy bacon, ranch dressing, and plenty of cheese, you’re not just making sliders — you’re crafting a bite-sized masterpiece that people will talk about long after the last one is gone.
Chicken Bacon Ranch Sliders are the kind of food that makes you feel good. They’re perfect for game day, family gatherings, potlucks, parties, or even a no-fuss weeknight dinner. There’s nothing fancy about them, and that’s exactly why everyone loves them. They’re familiar, hearty, and full of flavor. And let’s be real — when has the combination of chicken, bacon, and ranch ever disappointed?
This recipe is easy to customize and incredibly versatile. You can make it with leftover rotisserie chicken, use store-bought ranch, or even experiment with different cheeses. The sliders bake up golden and buttery, with a slight crunch on the outside and gooey goodness on the inside. It’s comfort food at its best.
Let’s dive into this cheesy, savory, ranch-kissed recipe that you’re going to want to make again and again.
Why You’ll Love These Sliders
Before we get into the kitchen, here’s why this recipe is a winner:
- Quick and easy: Perfect for busy days or feeding a crowd fast.
- Make-ahead friendly: Assemble ahead of time and bake when ready.
- Super customizable: Use what you have on hand — any shredded chicken will work, and you can swap cheeses or add extra flavor.
- Kid and adult approved: These are universally loved and often the first thing to disappear at any party.
Ingredients
This recipe makes 12 sliders — enough to feed a hungry group or keep you set with leftovers for lunch the next day.
For the Sliders:
- 12 Hawaiian sweet rolls (1 package)
- 2 cups cooked shredded chicken (rotisserie works perfectly)
- 6 strips bacon, cooked until crispy and crumbled
- 1 cup shredded mozzarella cheese
- 1 cup shredded cheddar cheese
- 1/2 cup ranch dressing (plus more for dipping if desired)
- 2 tablespoons chopped green onions or chives (optional, but adds great flavor)
For the Garlic Butter Topping:
- 4 tablespoons unsalted butter, melted
- 1 teaspoon garlic powder
- 1 teaspoon dried parsley
- 1/2 teaspoon onion powder
- Pinch of salt
Equipment You’ll Need
- 9×13-inch baking dish
- Serrated knife
- Mixing bowl
- Small saucepan or microwave-safe bowl (for butter topping)
- Aluminum foil
- Spatula or serving knife
Step-by-Step Instructions
Step 1: Prep the Oven and Rolls
Start by preheating your oven to 350°F (175°C).
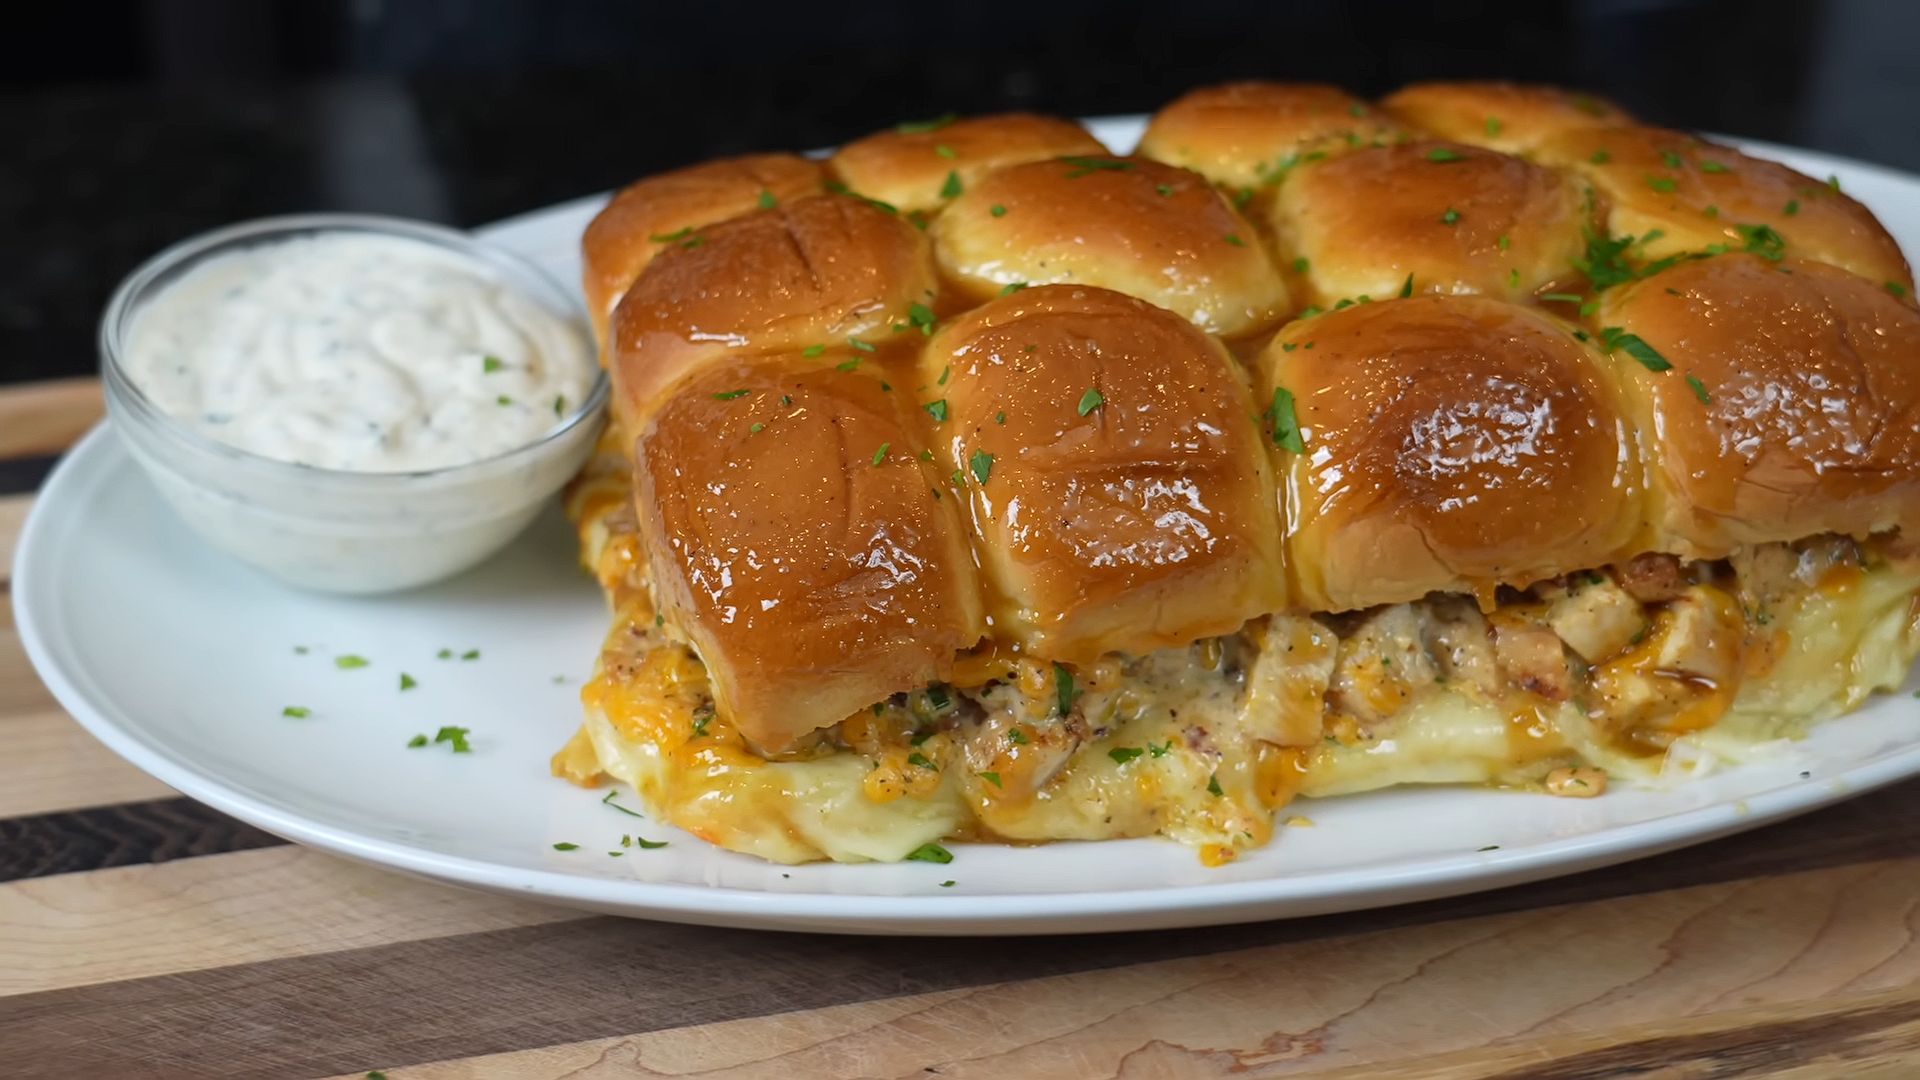
Take your Hawaiian rolls and, without separating them, slice the entire block in half horizontally using a serrated knife. You should have one large top and one large bottom piece — kind of like a big sandwich.
Place the bottom half in a greased or parchment-lined baking dish.
Step 2: Prepare the Chicken Mixture
In a medium mixing bowl, combine the shredded chicken, crumbled bacon, and ranch dressing. Mix everything together until the chicken is well coated and the bacon is evenly distributed.
This filling is flavorful enough on its own, but if you want to boost the flavor even more, you can add a bit of garlic powder or black pepper to taste.
Step 3: Layer the Sliders
Now it’s time to build.
- Chicken Layer: Spread the chicken bacon ranch mixture evenly over the bottom half of the rolls.
- Cheese Layer: Sprinkle the shredded mozzarella and cheddar cheese evenly over the chicken.
- Green Onion (Optional): If using, sprinkle green onions over the cheese for a little extra zing and color.
- Top Rolls: Place the top half of the rolls back on top to complete your slider stack.
Step 4: Make the Buttery Topping
In a small bowl, melt the butter and stir in the garlic powder, parsley, onion powder, and a pinch of salt.
Brush this mixture generously over the tops of the rolls. Make sure they’re well coated — this helps the sliders bake up golden and flavorful, with just the right crunch on top.
Step 5: Bake
Cover the sliders loosely with foil and bake in the preheated oven for 15 minutes.
After 15 minutes, remove the foil and continue baking for another 8–10 minutes, or until the tops are golden brown and the cheese is melted.
Keep an eye on them so they don’t get too dark. If the tops are browning too fast, pop the foil back on.
Step 6: Slice and Serve
Once baked, let the sliders cool for about 5 minutes — just enough to set the cheese a bit and make slicing easier.
Use a sharp knife or spatula to cut the sliders along the roll lines. Serve warm, with extra ranch dressing on the side for dipping if you’re feeling extra indulgent.
Tips for Perfect Sliders
1. Use Rotisserie Chicken for Convenience
If you’re short on time or don’t feel like cooking chicken from scratch, store-bought rotisserie chicken is perfect. It’s tender, flavorful, and shreds easily.
2. Crisp That Bacon
Don’t skimp on the crispiness. Soft or undercooked bacon will get lost in the mix. You want that salty, crunchy texture to contrast with the creamy ranch and melty cheese.
3. Hawaiian Rolls Are Best
The sweetness of Hawaiian rolls perfectly balances the savory richness of the filling. If you prefer, you can use regular dinner rolls, but try to stick with soft, pull-apart style ones.
4. Don’t Forget the Foil
Covering the sliders for the first part of baking keeps them moist and ensures the cheese melts before the tops brown. Removing the foil later gives you that golden, buttery finish.
5. Add Heat If You Like Spice
Want a kick? Add sliced jalapeños to the chicken mixture or sprinkle a bit of crushed red pepper into the ranch.
Variations to Try
These sliders are easy to customize depending on what you have in your kitchen or what flavors you love most. Here are some ideas:
Buffalo Chicken Bacon Ranch Sliders
Add 1–2 tablespoons of buffalo sauce to the chicken mixture for a spicy twist. Serve with blue cheese dressing instead of ranch for even more flavor.
BBQ Chicken Sliders
Swap the ranch dressing for your favorite BBQ sauce, and use pepper jack cheese instead of mozzarella. A few caramelized onions wouldn’t hurt, either.
Turkey Bacon Ranch Sliders
Use cooked turkey breast instead of chicken for a different take — perfect for leftover holiday meat. You can also use turkey bacon for a lighter option.
Veggie-Loaded Sliders
Add some sautéed bell peppers or spinach to the filling for a pop of color and a little boost of nutrition.
Make-Ahead and Storage Instructions
These sliders are great for meal prepping or prepping ahead of time for parties.
To Make Ahead (Unbaked):
- Assemble the sliders up to a day in advance, cover tightly with foil, and refrigerate.
- When ready to bake, brush with the butter mixture and pop them into the oven as directed.
Leftovers:
- Store leftover sliders in an airtight container in the fridge for up to 3 days.
- Reheat in the oven at 350°F for about 10 minutes or until warmed through. You can also microwave them, but the rolls won’t stay crispy.
To Freeze:
- Assemble the sliders (without baking) and wrap tightly in foil and plastic wrap.
- Freeze for up to 1 month.
- When ready to bake, thaw in the fridge overnight, brush with butter topping, and bake as directed.
Pairing Ideas
These sliders can be a full meal on their own, but if you’re looking to serve them with sides, here are some delicious ideas:
- Crispy potato wedges or fries
- Fresh veggie sticks with ranch dip
- A simple green salad with a tangy vinaigrette
- Coleslaw or pasta salad for a potluck-style meal
- Pickles or jalapeño slices on the side for extra zing
And for drinks? A cold glass of lemonade, iced tea, or your favorite beer pairs beautifully with the savory richness of these sliders.
Final Thoughts
There’s just something about the Chicken Bacon Ranch Slider that feels like comfort food in every bite. It checks every box creamy, cheesy, crispy, savory, and just the right amount of indulgent. Whether you’re feeding your family on a weeknight or hosting a crowd for the big game, this is the kind of recipe that delivers every single time.
And the best part? It’s easy. You don’t need fancy ingredients or hours of prep. Just a few simple components layered with care and baked to golden perfection.
So the next time you’re looking for something delicious, satisfying, and universally loved, reach for this recipe. Trust me you’ll want to keep it in your regular rotation.